 ">
"> Tutorial: WordPress Theme Customizer and Bootstrap 3 Image Carousel… Who needs plug-in’s?
Hello all. First and foremost, let me apologize for my extended hiatus from updating my blog. To say I have been busy in the last year would be an understatement. Anyhow, enough about me.
I found this really cool way to give your client the ability to update their Bootstrap 3 image carousel using the WordPress Theme Customizer. This comes in especially handy for people using both WordPress and Bootstrap 3 as part of their website build. This is also useful to theme developers that eventually hand control of the website over to the client. So, of course, there are a bunch of plugins out there that have this ability, but… quite frankly, I’m growing ever tired of plugins and their issues. Utilizing the WordPress Theme Customizer has given me the ability to create my own pseudo-plug-ins and lighten the load of my websites on the whole.
My logic was this. I’m already using WordPress and Bootstrap to create my theme. Bootstrap has a built in image carousel, why should I have to download a plugin or some other library just to hook the ability for the client to update the carousel on their own? Seems like bloat and nonsense, so I took action. My solution… the WP Theme Customizer.
There is no way for me to demo how this works here on this website as it deals with back end (dashboard) functionality. This is all PHP development so buckle in! I really want to thank the contributor at Theme Foundation for guiding me in the right direction to complete this process. I highly recommend anyone using the Theme Customizer read that article.
The Bootstrap 3 Carousel Portion:
We’re going to have to make some assumptions here and probably throw most custom styling out the window for now just to get the point across. Adding styles can always come at a later date or after you get the upload functionality working.
I’m going to use a default Bootstrap 3 Carousel that can be found here to base my HTML markup on. Of which; the actual markup for this carousel looks like this (FYI; I removed the buttons):
This code is about as basic as it gets for a Bootstrap Carousel. As you can see, there are sections for the image, heading text, and paragraph or descriptive text already placed within the “out of box” code. This gives us some logic we can apply using the WordPress Theme Customizer to make this section dynamic rather than static, and make updates to this carousel much easier for the webmaster. Keeping in mind that all the classes you see in the above code are coming directly from Bootstrap. They can be edited, but that’s another tutorial.
Anyhow, this HTML code can exist on any page in your WordPress theme that you want the image carousel to appear on (IE: front-page.php, home.php, single.php, etc.). So, go ahead and paste the above code into one of your theme’s pages — wherever you want it to display.
WordPress Theme Customizer Functions:
Now we have to create the functionality to utilize the WordPress Theme Customizer in our theme’s “functions.php” file.
So, now it’s time to break down this particular theme customizer function into a few sections that will all come together in the end to produce the result I have spoken of. Lets start with adding a “section” to the theme customizer for this function (paste below into “functions.php”):
As you can see above, all we are doing here is defining the section of the theme customizer that we want our data collection to appear in. When you go to the “customize” screen from your dashboard, this php handles the section title and description only. It will not appear until other functions are added to the code, but this is the first step in creating a WordPress Theme Customizer function. Make a section.
Now that we have the section out of the way, we need to be able to upload an image that will go into the Bootstrap Carousel. The following function allows for this functionality within the new section we created. This can be done using mostly Theme Customizer hooks and controls as seen below:
The most important parts of the above customizer function are the “add_setting” and “add_control” commands. Using Theme Customizer syntax “new WP_Customize_Image_Control” automatically places a image uploader into this section. Something else to note, since we want to collect multiple sets of data in one section, the ‘section’ => ‘*’, is very important for placement of this function. It has to match the section we defined in the first customizer example which in this case is “home_slide_img_one”. Hopefully that makes sense. If you don’t place the function in the same section as the other commands you want to run, this will not work properly.
Now, if all we wanted to do was be able to change the image, we could do a little more programming and just close this out with the “add_action” command. Even though at this point, this code will not execute in your theme customizer, please hang in there until the end and everything will fall into place.
Getting back to the Bootstrap portion of this build, we have some heading text, description text, and ability to link the image to a URL functionality left to establish before we can wrap this up. So, let’s add our heading text:
Once again, as you can see the key elements in place here again. “add_setting” and “add_control”, these controls do most of the work for us. Here we are just gathering text to appear between the heading or h1 tags within the Bootstrap 3 Carousel. Notice how I sanitized the callback’s for the text entries? It’s pretty easy to do and will help secure your text fields that can commit to the database. Sanitization can be performed on most input fields. All this section is doing is providing heading text and nothing more.
So, lets do the same thing with what I call the “descriptive text” or plain paragraph text also used in the Bootstrap 3 Carousel. This will be the same as the above function for the heading but will call in the descriptive text rather than the heading text:
As you can see, much of the same in this function. What we’re doing here is gathering multiple data-sets that we can then plug into the Bootstrap 3 Carousel HTML page. Being that all of these data-sets relate to one image in the slider, that’s why I want them to all have the same “section” argument in the PHP code.
On to the last step: Adding the url to link the image within the WordPress Theme Customizer to a URL of your choosing. This is going to be basically the same as the last two functions as we’re just gathering a url string to be echoed on a page. The only real differences here are in the syntax. Other than that, it should appear the same as the previous two functions:
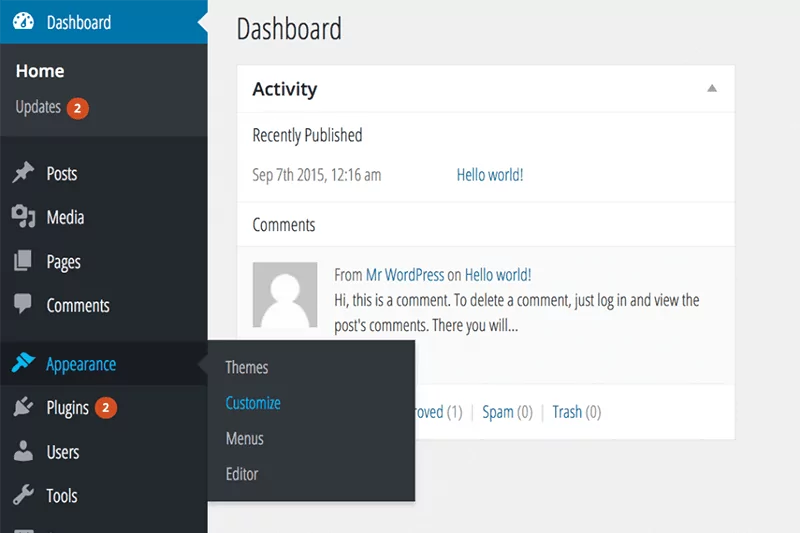
Now we can bring the function to life using the “add_action” command. This is the final step in adding these functions to your theme customizer. After you add this last bit of code, you will see all the work we have put in so far appearing in your “Appearence –> Customize” section of your WordPress Dashboard.
Here is the final code snippet to start the engine on this function:
Combining All Snippets
All combined for those that may have lost track… your entire function for this image uploader should look like this in your “functions.php” page within your WordPress Theme:
Combine Gathered Data With Bootstrap 3 Carousel
Now for the easy part! The hard part was just accomplished in the Theme Customizer. All we have to do now is tie in our php functions into the Bootstrap 3 Carousel! *Remember… I’m only doing the first in a sequence of three in this tutorial as I think figuring out the rest should be easy at this point. Using the WordPress command “get_theme_mod();” makes this all possible!
So, here’s what the HTML code will look like with the Theme Customizer functions in place:
In Conclusion:
Plugging the PHP commands into the existing HTML based Bootstrap 3 Carousel is obviously pretty easy. It’s creating them that can be difficult. Hopefully this tutorial will get you started in the right direction. Not only on how to avoid adding unnecessary plugins to handle your work-load, but also how to utilize the WordPress Theme Customizer to do cool stuff like this all over your WordPress website. This is just the tip of the iceberg and will really only apply to a select group of Theme Developers (using WordPress and Bootstrap), but utilizing the Theme Customizer on your WordPress site is something every Theme Developer should know. It’s a very powerful tool as you can see above.
Your final product should resemble this in the Theme Customizer section of the WordPress Dashboard:

Please keep in mind that some major styling (CSS) may need to be done to fit you or your client’s needs. This tutorial just shows how to set up the WordPress Theme Customizer to allow the webmaster to easily add new images and text (to the Bootstrap 3 Carousel) without having to touch a line of code!
I look forward to any questions and comments. Especially since this one is kind of a teaser to see if you can figure out the rest, let me know if you run into any issues. Thanks for visiting!
Hello, I tried to implement this into my template but it doesn’t work. I am using Bootstrap 3 and WP 4.4.2. After few attempts I just tried to copy whole code into the template, but still without results -> It doesn’t show anything but question marks. Can you help me with this please? Or maybe just show working example with a source. Thanks 🙂
Hey David,
Sorry to hear about your troubles with this. It definitely took me more than a few times to get it right as well! If your building a custom theme, there could be conflicting functions in your functions.php file. If you’re working with a pre-built theme, it could be the same… conflicts in the functions.php, especially if the theme already has customizer functions on it. My concern is that you’re seeing “question marks”, I have yet to see that output even when I was developing this. Is your WP install in “Debug Mode”? If not, I would recommend turning that on (in config.php in the root) to see what’s going on with the php. Unfortunately, without letting you into my server, I can’t show you the raw code, and anything you would see viewing the source of a web-page wouldn’t help because “view source” only shows the output of the raw php code. Contact me on my contact page if you would like further help. I have a website in development using this scheme that I could probably share with you privately. Thanks David.
Hi Ben,
I do not know exactly the post of your helpful article but I am using bootstrap 4.0 + and I have been working in themes customization and I got the template from Bootstrap Web Site. Anyways, they have an static template with carousel so I was decided to include your code to see if works as you mentioned it is for version 3.0. Conclusion, I works perfectly, My carousel is 100% functional so I want to say thank you for your experience.
All the best Ben,
Thank you
Omar! Thanks for that! Glad to see it working into 4x as well. I’m using BS4x now as well, just haven’t been able to use this. Thanks again!
Hi,
thanks for the tutorial. However, all is working but cant upload images. if i hard code them in src=” then all good. i am using the latest wordpress and bootstrap 4, have changed the classes accordingly for ‘item’.
<a href="”>
<img class="first-slide" src='’ alt=””>
Is this <img class= line correct or need to change something?
many thanks,
Andrew
Hi Andrew,
The image class=”first-slide” needs to change for every subsequent slide. If you aren’t able to use the customizer to correctly call in the images, maybe try using Advanced Custom Fields? I have switched away from using the customizer in favor of ACF for circumstances like this. Either way, the class name has to change from “first-slide” to “second-slide” and so on. Hope this helps!
Leave a Comment Below...